Making Palm Trees
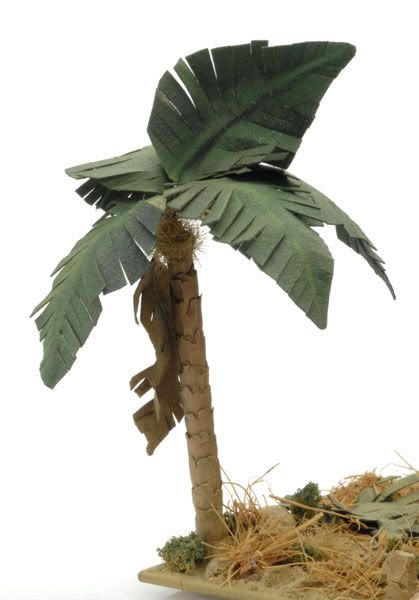
Hey all! I've been working on a project and this diorama was the test bed for a lot of techniques. So here's my brain dump take it as you may, and please let me know if there's any improvements as I'm desperately seeking to learn new ideas.
Palm Trees
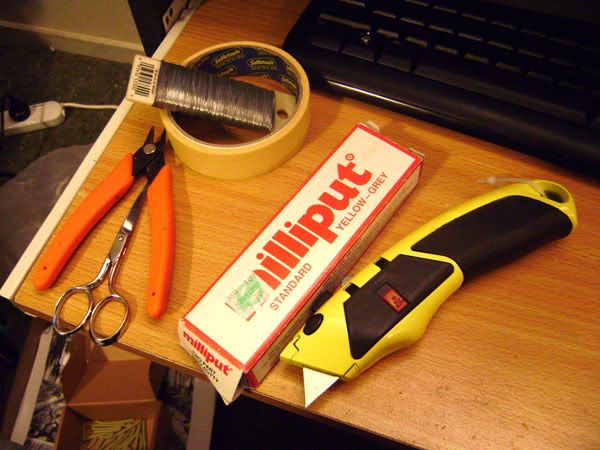
Supplies:
Milliput Sculpting Putty
30 Gauge Floral Wire
Masking Tape
Tools:Wire Cutters
Scissors
Stanley Knife
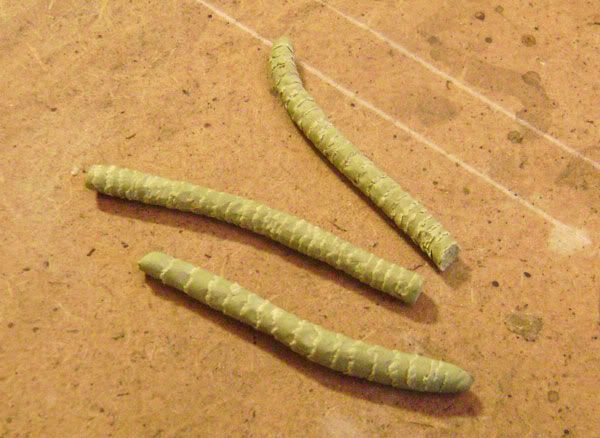
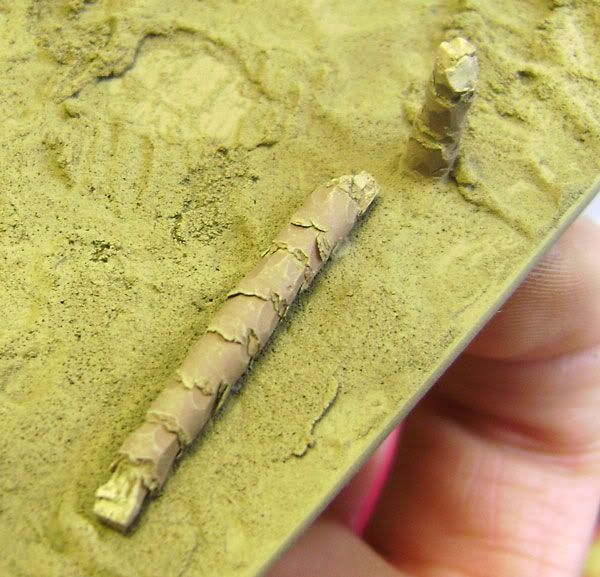
Step 1: Trunks
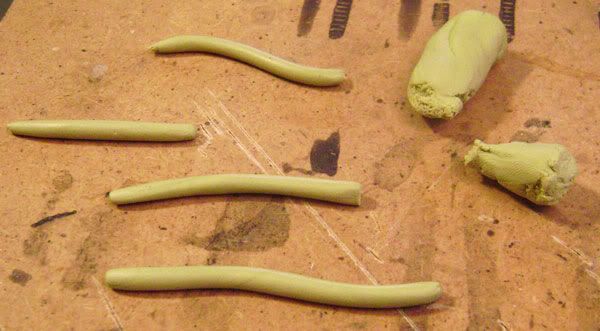 The first thing I did was roll several trunks from Milliput sculpting putty (which is a two-part putty you can get at art stores or online). If youre not familiar with Milliput, its a great sculpting putty that carves very well. Its actually what we use to sculpt tank hulls because you can put a lot of detail into it. For this project, green stuff was too elastic and did not give me as sharp and natural look when I tried to cut into it.
Let the trunks dry over night and harden. Milliput takes about 24 hours to cure through, but you can start carving about 8-12 hours later.
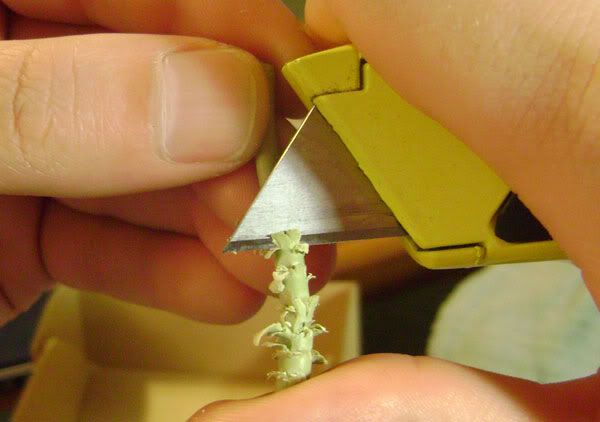
Grab your handy stanley knife and start cutting rings around the trunk. Once youre done with that brush off the flakes and you should be set!
Fronds
Next up are teh fronds. I can't take credit for this discovery. I found it ages ago on the web as a tutrorial, but didn't like how they did the trunk, hence my modification above.
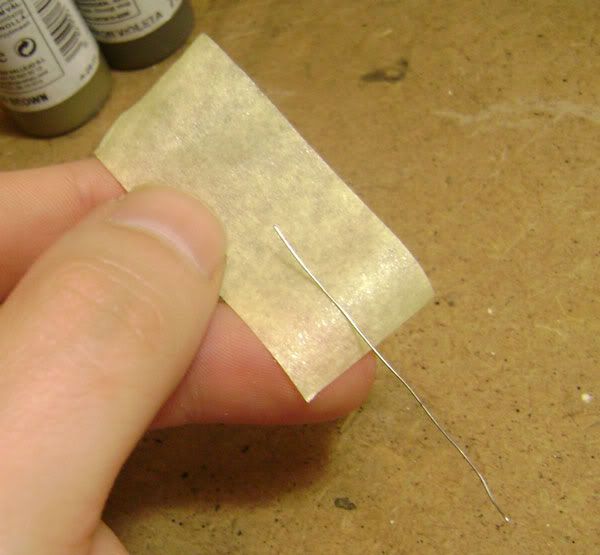
Cut a piece of masking tape to size and place a small piece of wire on it as shown below:
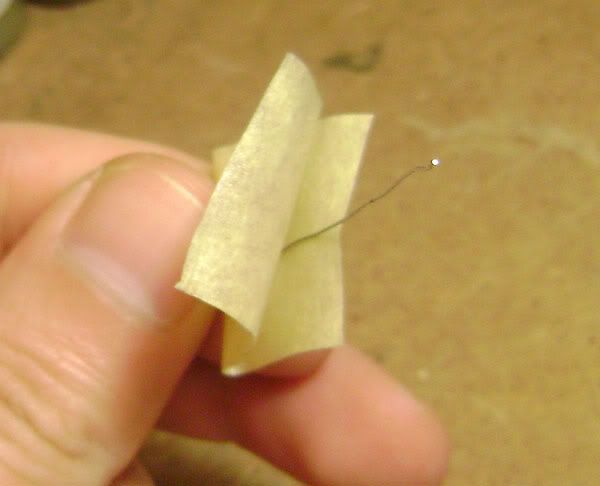
Fold the masking tape over and press it together to fix the wire:
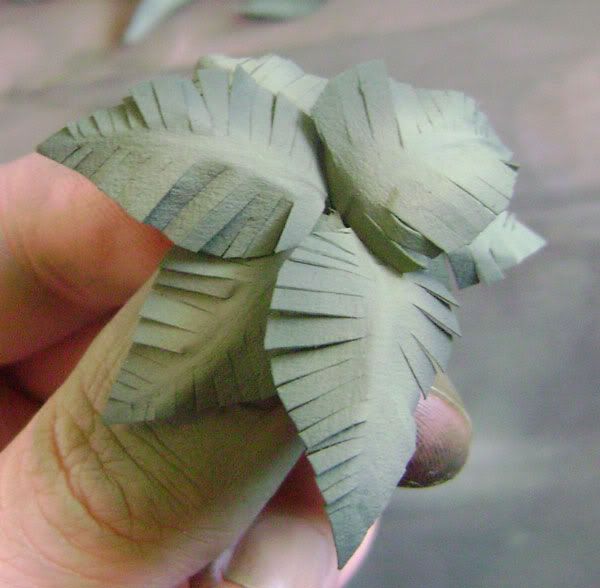
Then cut the frond to the shape youre looking for. I recommend you check out plams on google to get an idea of the huge variety of fronds out there. I was very surprised!
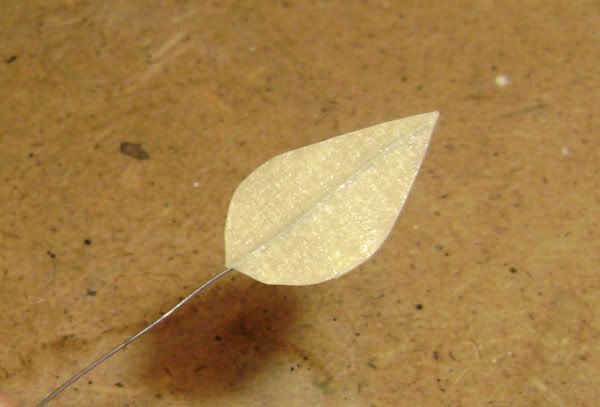
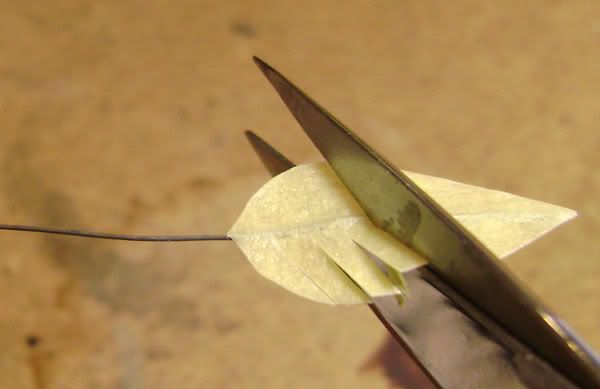
Then cut the frond into a palm leaf as follows:
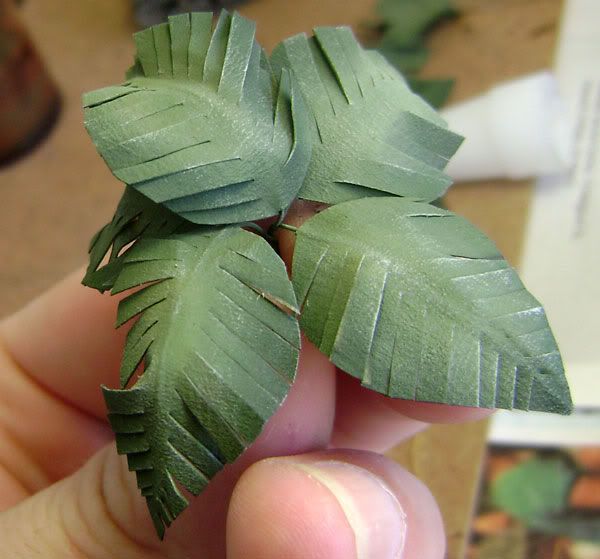
And bend to shape:

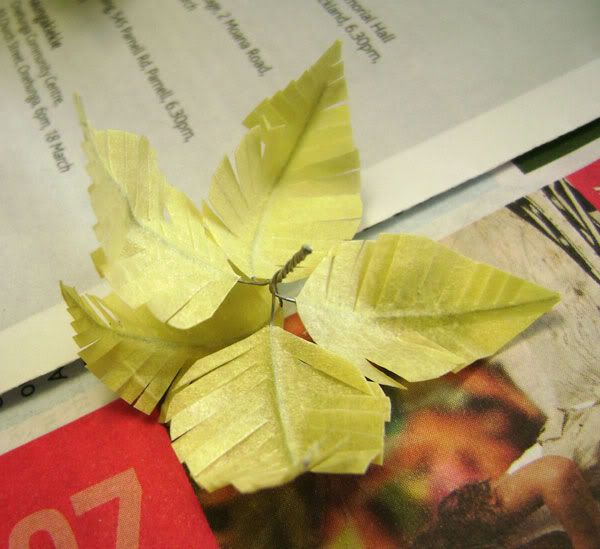
Rinse and repeat 5-8 times and then twist the stems together to form the palm tree top. Bend and twist the fronds anyway you like, but in retrospect I would basecoat them before bending to make it easier to paint.
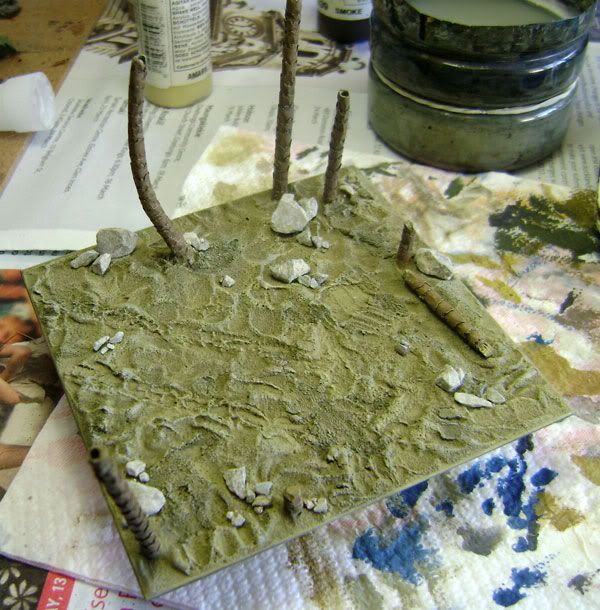
Drill a hole in the to of the palm trunk. I kept them separate until the last possible moment. so it was easier to paint the diorama, but if youre doing individuals, you should be set. I've put the painting and detailing stuff below.
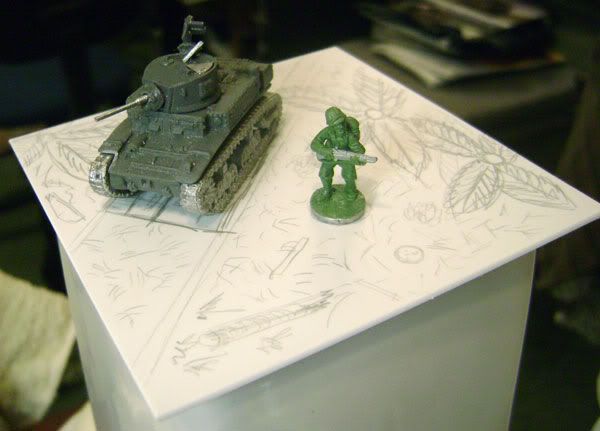
Painting!Planning. Plan your diorama, base, whatever. Make sure that you know the story you plan to communicate. Nothing spoils a scene more than random assembly. I doodled my story onto the 2mm plasticard base.
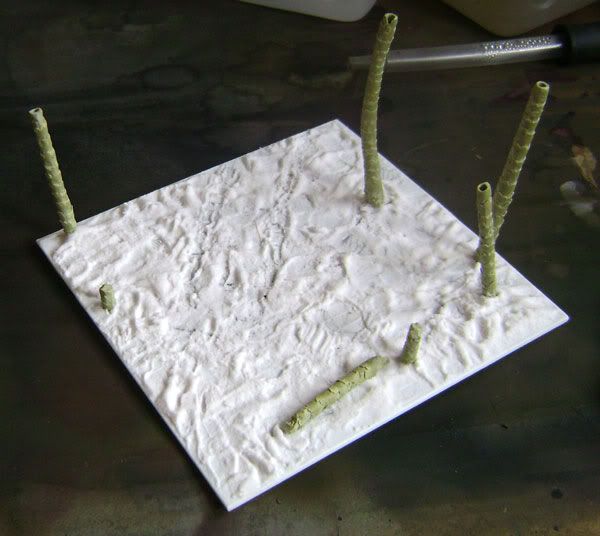
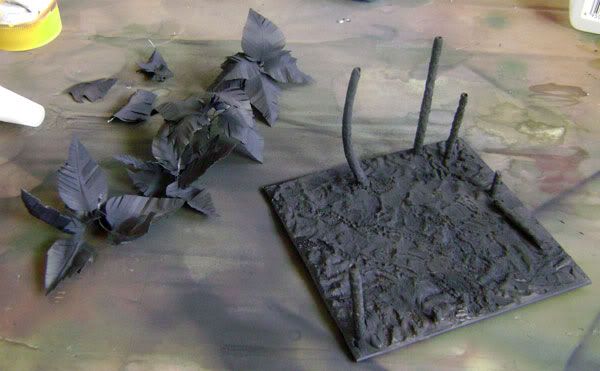
I pinned the palm tree trunks into the base and spackled the base.
I then primed the base and the fronds in black
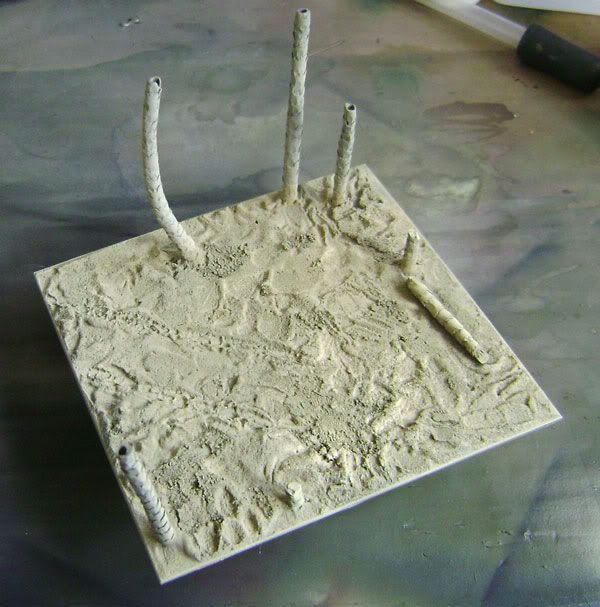
I airbrushed the basecoat with Tamyia Dark Yellow (XF 60)
I airbrished the fronds Deep Green (XF-26) and spot airbrushed the center of each leave with 50% Dark Yellow and 50% Deep Green, then I dry brushed the Fronds with Buff (Vallejo 976)
I painted the trunks with US Tan Earth (Vallejo 874), and drybrushed with Buff
Next I places some rocks and highlighted the base with Buff and Stone Grey (Vallejo 884)
Next up I added some vegetation as well as the painted Marine.

I purchased cheap welcome mat made and cut the bristles off. I painted the portions I wanted to have grass with PVA glue and sprinkled the bristles on the base.
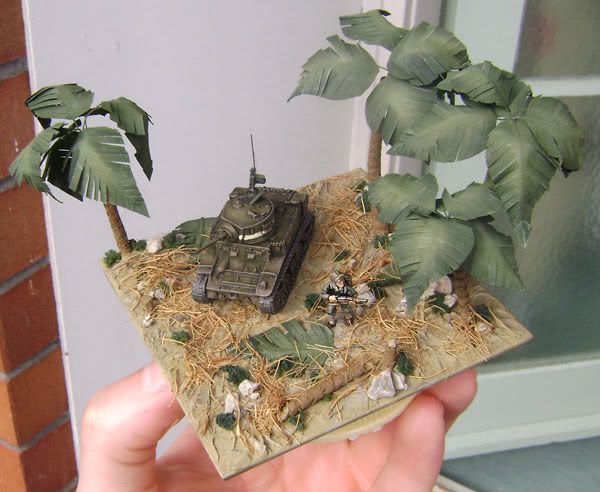
I wasn't happy with the base intially. It didnt connect with itself, so I gave the whole thing a light dusting of Tamyia dark yellow as well as added several small bushes.
Finally I glued in the fronds and used dark brown flocking at the base to simulate the dead fluff.
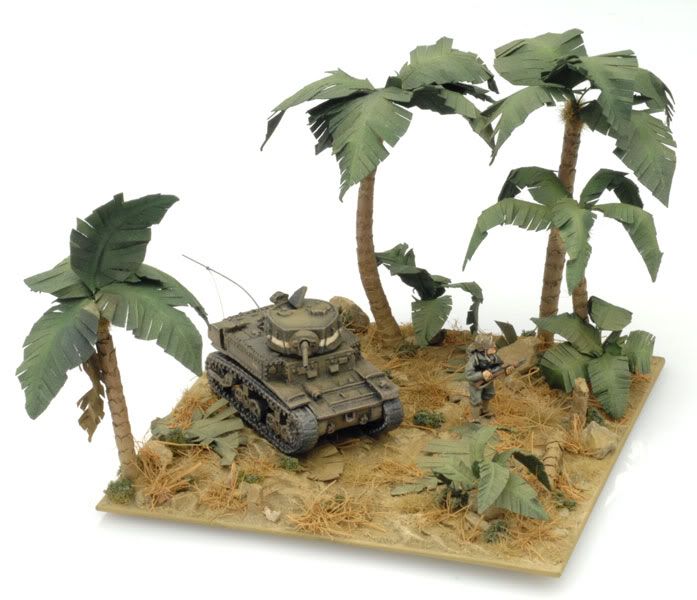
Thats about it! Questions and comments welcome!
Excellent work mike. I love the palm trees.
ReplyDeleteI love the process, and the end result is sheer eye-candy!
ReplyDeleteI am very much looking forward to the venture into the sweltering Pacific, the terrain will be fun challenge.
Outstanding. Have to use that to make trunks for bunker use too. :)
ReplyDelete