Get Off My Land: The Tragic Story Of Black Squadron

The TIE/ln
The Galactic Empire covered a large amount of territory. Policing it required economic solutions. One such advancement to that end was the Sienar Systems TIE (Twin Ion Engine) fighter platform. By the time of the rebellion, the TIE had been developed into the famous TIE/ln (LN, not IN). This "line" fighter, based out of a local carrier ship, was ideally suited to operate in large numbers. Many thousands of TIE/ln starfighters were built for the Galactic Empire, and they formed the bulk of the Empire's starfighter fleet.
When the Rebel Alliance went to war with the Galactic Empire, the TIE/ln fighters went into action, easily outclassing the outdated fighters used by the rebels. However as the older Z-95 Headhunters and Y-wing assault fighters began to be supplemented by the new T-65 X-wing, the odds closed up somewhat.
The TIE/ln could still rely on numbers to overwhelm the newer rebel ships. Furthermore, the Empire could also draw from a much larger and more experienced pilot pool, making it a lot easier to replace losses compared to the Alliance.

 |
| The Rebel Menace |
With its reliance on numbers it is perhaps curious that the Imperial Navy only committed nine starfighters in the defense of the Death Star: eight TIE/ln and one TIE "Advanced x1". Grand Moff Tarkin's complacency about the Rebel attack was to prove his downfall, but Darth Vader would not be so easily taken and deployed his own personal elite Black Squadron to deal with the Rebel Attack in spite of Tarkin's orders to the contrary. The rebel assault force contained 32 starfighters, a pitifully small force when you consider just how many thousands of TIE/ln squadrons defended the Death Star (not to mention the squadrons stationed on the nearby capital ships). Still, Tarkin's stubbornness made the odds for Black Squadron a lot more steep than what could have been. Still, they deployed.
Black Squadron
A standard squadron of TIE/ln starfighters has 12 fighters. According to most sources, Black Squadron had eight, with Darth Vader in overall command. Each pilot was given the designation DS-61 (DS is the assingment tag, in this case "Death Star" and the 61 references the parent unit associated with Black Squadron, the 61st Attack Fighter Group). They were then ordered 1-8 (DS-61-2, DS-61-3, etc). Black Leader (or technically DS-61-1) may have been Vader himself, but there is no records of that designation being used officially.

The roster of Black Squadron was as follows:
| Name | Operating Number | Call Sign | Starfighter |
| Darth Vader | n/a | n/a | TIE Advanced x1 |
| "Mauler" Mithel | DS-61-2 | Black 2 | TIE/ln |
| "Backstabber" | DS-61-3 | Black 3 | TIE/ln |
| "Dark Curse" Phennir | DS-61-4 | Black 4 | TIE/ln |
| Unknown | DS-61-5 | Black 5 | TIE/ln |
| Unknown | DS-61-6 | Black 6 | TIE/ln |
| Unknown | DS-61-7 | Black 7 | TIE/ln |
| Unknown | DS-61-8 | Black 8 | TIE/ln |
There was at least one additional (or perhaps one of the unknown pilots above) Black Squadron pilot in the battle mentioned by sources. Qorl (Operating Number: CE3K-1977) was also involved in the battle, and although he claims all TIE squadrons were deployed in the battle, there is significant evidence that only Black Squadron participated. This indicates that he must have been a member of the Squadron to have been involved in the fighting, however it is unclear where he was positioned in the unit.
Finally, Lieutenant Tanbris was the squadron's non-flying executive officer. He was stationed on the Death Star and coordinated the squadron's actions and commanded the unit when not in combat.
 |
| Vader leads the attack on the Y-Wings |
Black Squadron faced some pretty serious odds, however, these were some of the Imperials' most professional pilots, and the cost for the Alliance to succeed here was never going to be cheap. Black Squadron scrambled to meet the rebel assault in two waves. Vader, Black 2 and 3 took on the rebel Y-wing assault craft, while the rest of the squadron, led by Black 4, flew cover and engaged the rebel X-wings.
For their part, the rebels split their forces into two assault groups. Red and Gold squadrons assaulted the Death Star trench, while Blue and Green Squadrons attacked the Death Star superlaser dish. This helped even the odds for Black Squadron, who only had to deal with 19 rebel fighters in the trench area.
Final Tolls
 |
| Biggs bites the big one... |
Red Squadron
Original Strength: 12 X-wings
Destroyed by Black Squadron: Red Leader, Red 3, Red 4, Red 9, Red 10, Red 12
Damaged By Black Squadron: Red 2 and Red 5
Destroyed by Death Star Defenses: Red 6 (couldn't hold it), Red 7, Red 8, Red 11
Survivors: 3 (Red 2 and Red 5)
 |
| Y-wing in the bag |
Original Strength: 7 Y-wings
Destroyed by Black Squadron: Gold Leader, Gold 2, Gold 5, Gold 6
Destroyed by Death Star Defenses: Gold 3, Gold 4
Survivors: 1 (Gold 7)
Squadron Biographies
Black Squadron consisted of the best pilots in the Empire. Although lost in the battle, Black Squadron was reformed afterward to carry on its legacy. Here are a few biographies on the known pilots of the original Black Squadron.
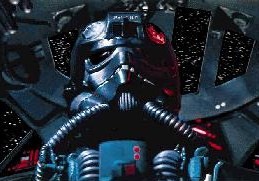
 Darth Vader
By far the best pilot in the squadron Vader led the attack against the biggest threat: the Gold Squadron's Y-wings. Vader alone destroyed Gold Squadron's first wave, including Tiree in Gold Two, Jon Vander in Gold Leader and Davish Krail in Gold Five. Vader also destroyed Red Leader, Red 10, and 12 when the X-wing unit attempted a second attack run. On the third, and final trench run, Vader destroyed Biggs' Red 3 and severely damaged Wedge's Red 2. Vader had Luke's Red 5 dead-to-rights when a timely intervention by the Millenium Falcon saved the rebel pilot. A blast from the freighter knocked Black 2 into Vader's TIE Advanced, which was sent spinning into space.

By far the best pilot in the squadron Vader led the attack against the biggest threat: the Gold Squadron's Y-wings. Vader alone destroyed Gold Squadron's first wave, including Tiree in Gold Two, Jon Vander in Gold Leader and Davish Krail in Gold Five. Vader also destroyed Red Leader, Red 10, and 12 when the X-wing unit attempted a second attack run. On the third, and final trench run, Vader destroyed Biggs' Red 3 and severely damaged Wedge's Red 2. Vader had Luke's Red 5 dead-to-rights when a timely intervention by the Millenium Falcon saved the rebel pilot. A blast from the freighter knocked Black 2 into Vader's TIE Advanced, which was sent spinning into space.

Mithel is the squadron's highest scoring pilot, with 26 confirmed rebel kills prior to the Battle of Yavin. He had each kill recorded as a flame painted on the hull of his TIE/ln. Mithel flew with a holo of his son near his flight controls. In the battle, he flew Vader's left wing during the battle, screening the TIE Advanced x1 from X-wing fire. When the Millennium Falcon blasted the Black Squadron, Mauler's TIE was sent into the trench wall and was he was instantly killed.
 Backstabber
Backstabber was a Corellian pilot who earned a reputation as a tenacious pilot, never giving up his target. He flew Vader's right wing during the battle, and like Mauler, met his fate upon the arrival of the Millennium Falcon.
 "Dark Curse" Phennir
Phennir led the covering group of TIE/ln fighters. He had earned great praise in many battles, leading to his assignment to Black Squadron prior to the Battle of Yavin. Privately, he planned for his assignment to be his last before retirement. In the battle, his Black 4 scored a direct hit on Luke's Red 5 and he nearly had the rookie pilot's number, when the rebel was bailed out by Wedge Antilles's Red 2. Wedge outmaneuvered Phennir and destroyed Black 4 with a precise volley. Phennir's younger brother, Turr Phennir, would use the loss of his brother to fuel his revenge as a TIE/in pilot in the Battle of Endor.
 Survivors
In the skirmish only five pilots, three rebel, and two Imperial, would live through the battle. Luke and Wedge returned to safety in their severely damaged X-wing starfighters as did Keyan Farlander in Gold 7. Vader's TIE Advanced limped back to the Imperial outpost on Vaal, and returned to the fight. Black Squadron pilot Qorl crashed his damaged TIE on Yavin 4's moon where the rebel base was situated. Marooned for nearly 20 years, Qorl eventually escaped to rejoin the remnant Imperial fleet, but became disillusioned with them. He chose a hermit's life, returning to Yavin's moon before siding with the New Republic to battle Dark Forces.
In the end, Black Squadron lost six pilots. However, for their size, they inflicted a lot heavy toll: six X-Wings, and six Y-Wings, a 2:1 record. Not bad for the only squadron deployed against the rebel assault!
Afterward
So there's a little science fictional history lesson on Black Squadron. Incidentally, Black Squadron will be making an appearence in a few weeks at Battlecry, the local gaming convention, under my command during the X-Wing tournament. Hope to see you locals there!

Backstabber was a Corellian pilot who earned a reputation as a tenacious pilot, never giving up his target. He flew Vader's right wing during the battle, and like Mauler, met his fate upon the arrival of the Millennium Falcon.
Phennir led the covering group of TIE/ln fighters. He had earned great praise in many battles, leading to his assignment to Black Squadron prior to the Battle of Yavin. Privately, he planned for his assignment to be his last before retirement. In the battle, his Black 4 scored a direct hit on Luke's Red 5 and he nearly had the rookie pilot's number, when the rebel was bailed out by Wedge Antilles's Red 2. Wedge outmaneuvered Phennir and destroyed Black 4 with a precise volley. Phennir's younger brother, Turr Phennir, would use the loss of his brother to fuel his revenge as a TIE/in pilot in the Battle of Endor.
In the skirmish only five pilots, three rebel, and two Imperial, would live through the battle. Luke and Wedge returned to safety in their severely damaged X-wing starfighters as did Keyan Farlander in Gold 7. Vader's TIE Advanced limped back to the Imperial outpost on Vaal, and returned to the fight. Black Squadron pilot Qorl crashed his damaged TIE on Yavin 4's moon where the rebel base was situated. Marooned for nearly 20 years, Qorl eventually escaped to rejoin the remnant Imperial fleet, but became disillusioned with them. He chose a hermit's life, returning to Yavin's moon before siding with the New Republic to battle Dark Forces.
In the end, Black Squadron lost six pilots. However, for their size, they inflicted a lot heavy toll: six X-Wings, and six Y-Wings, a 2:1 record. Not bad for the only squadron deployed against the rebel assault!
Afterward
So there's a little science fictional history lesson on Black Squadron. Incidentally, Black Squadron will be making an appearence in a few weeks at Battlecry, the local gaming convention, under my command during the X-Wing tournament. Hope to see you locals there!
I like fictional history a lot.
ReplyDeleteIsn't it just fiction then?
ReplyDeleteGood Stuff Mike!
ReplyDeleteThe old 8 TIE swarm. Good luck!